 |
| Afternoon tea treat |
Once again my husband whipped up a beautiful breakfast feast for all the sleepy heads in our household to enjoy. Fluffy buttermilk pancakes with sticky maple syrup, platters of plump, golden eggs, crispy smoked bacon, and buttered wholemeal rye toast is a wonderful way to start a Sunday.
I have a handful of “go to” chocolate cake recipes that always turn out, always taste great and are always appreciated. This one is from Nigella Lawson’s well thumbed cookbook, Feast, Food that Celebrates Life. If you don’t have the patience or inclination to make the quaint buzzy bee decorations then serve the cake simply with the glossy icing. I used a vanilla flavoured fondant for the bee bodies because my allergy means marzipan is out. Oh and don’t be deterred by the long baking time – your house will smell divine!
Buzzy Honey Chocolate Cake
Having made this cake on numerous occasions, I have managed to simplify the original method and find this works just as well, but reduces the preparation time.
Ingredients for the cake
100 g dark chocolate – I used Lindt with 70% cocoa butter
225 g unsalted soft butter
275 g brown sugar
125 ml honey
2 large eggs
200 g plain flour
1 teaspoon bicarbonate of soda
1 tablespoon cocoa
250 ml boiling water
Sticky Honey Glaze
Ingredients for the icing
60 ml boiling water
125 ml honey
175 g dark chocolate – I used Lindt with 70% cocoa butter
75 g icing sugar mixture
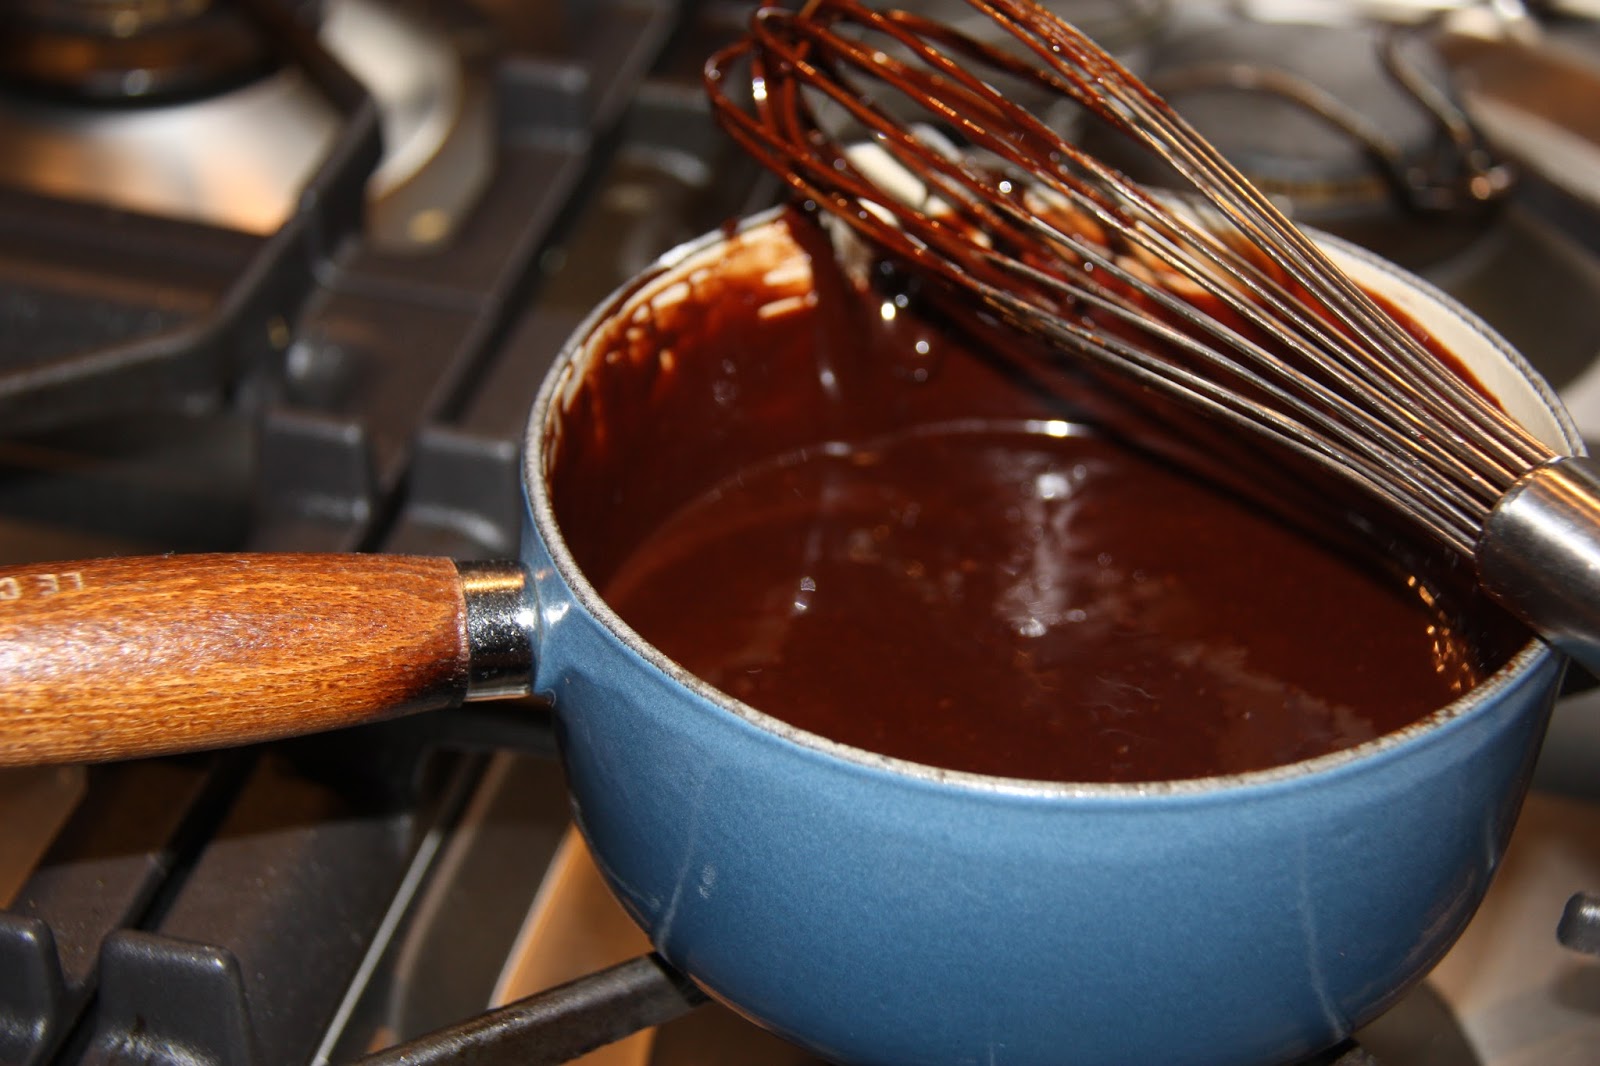 |
| A whisk will keep your icing from burning and result in a velvety smooth consistency |
Place all of the ingredients with the exception of the icing sugar into a saucepan over a medium heat and warm up until the chocolate melts. You will need to slowly whisk the mixture to prevent it from burning. Remove from the heat, add the icing sugar and whisk again until smooth.
Buzzy Bees
Ingredients for the decorations – I made 8 bees but the number of cute critters is up to you.
handful of fondant at room temperature
yellow food colouring
cornflakes
edible ink decorating pen

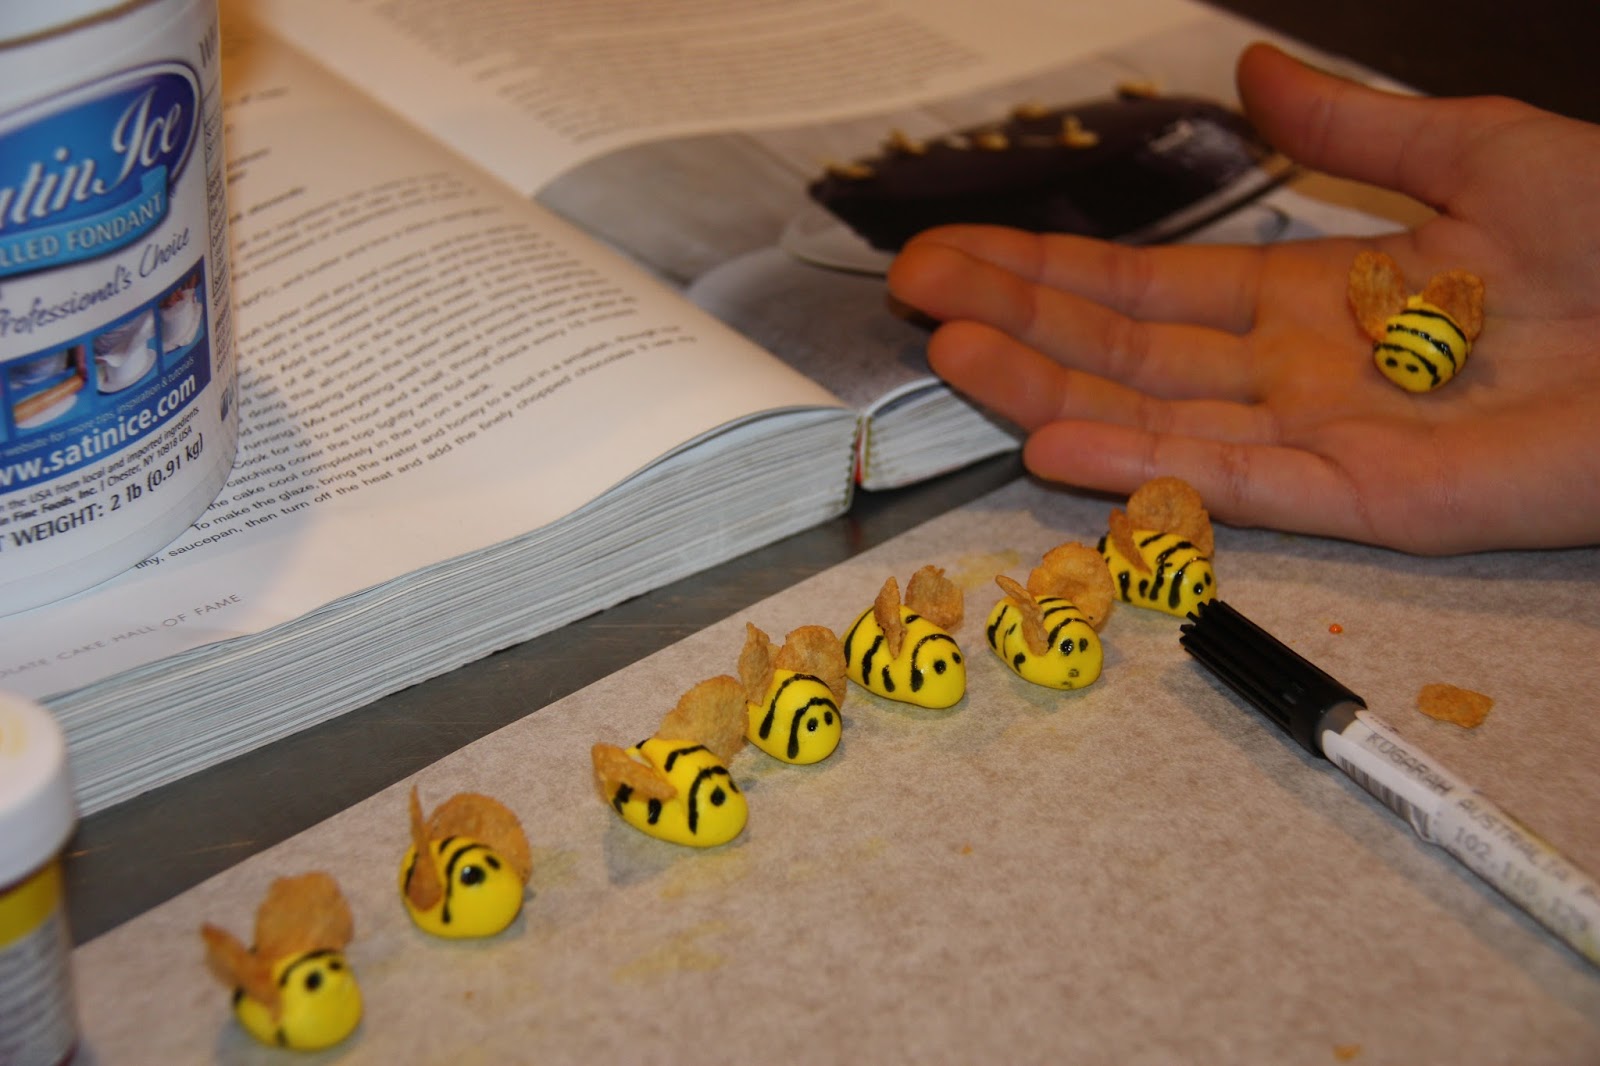
Making these bees is very easy. It is just like crafting shapes out of Play-doh, but better because you can eat your mini masterpieces.
Take small balls of fondant, add the tiniest dab of yellow colouring and roll these in an egg shape one by one between the palms of your hands.
Stick a cornflake on either side of the yellow fondant to resemble wings. Leave to set for about 10 minutes, then draw on the stripes using a pen with edible ink. This is available from cake decorating shops. You can also dip a skewer into the chocolate icing and paint this on, although it is time consuming.
Now, how to make the cake…
Preheat your oven to 180 degrees conventional setting. Lightly grease and line a 23 cm spingform cake tin. It is important to use the correct sized cake tin to ensure your cake rises and cooks as required.
Melt the chocolate and butter in the microwave, taking care to check that it does not burn. Alternatively you can do this in a bowl suspended over a pot of simmering water on the stove.
Scrape the chocolate/butter mixture into a mixing bowl – I used my KitchenAid – and beat with the sugar until creamy.
Add the honey and eggs, beating well after each addition.
Add the flour, bicarb and cocoa and mix again until completely smooth.
On a low speed, beat in the boiling water pouring it in slowly to prevent splattering and burning yourself.
Pour the mixture into your cake tin. Don’t be alarmed by the runny consistency The batter is supposed to look like this and will solidify during the baking process.
Place in your preheated oven and bake for up to 90 minutes. My cake took 80 minutes to cook. As ovens vary I recommend that the cake is checked after 60 minutes and then again 15 minutes later. Do not go over 90 minutes. This cake contains a fair amount of sugar which will help retain the heat and continue the cooking process even once the cake is out of the oven. As a visual guide, once the cake has completely come away from the sides of the tin it is ready.
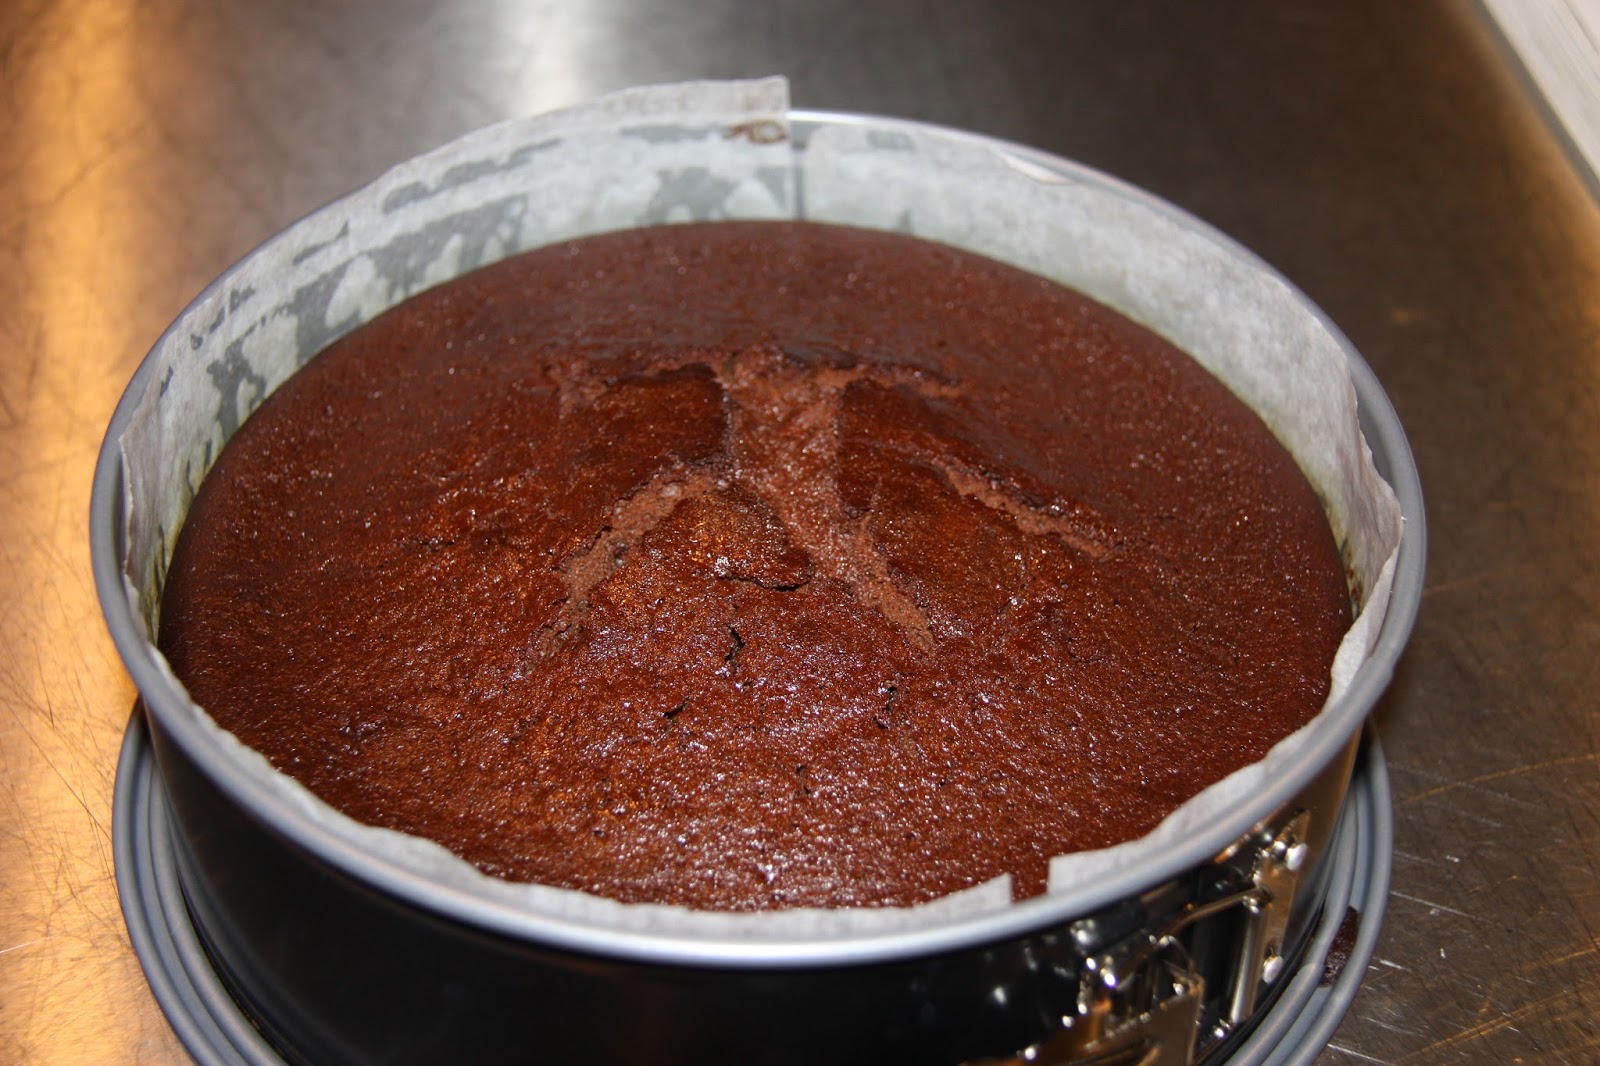 |
| Your cake should look like this once it comes out of the oven |
Allow the cake to cool completely in the tin. Then turn it out onto your serving plate.
To ice the cake and avoid a messy plate, I surrounded the base of the cake with strips of aluminium foil. This caught excess icing and was easily folded up and disposed of. Pour the icing evenly over the cake, using a metal spatula to smooth it over the sides. I found the icing was easier to handle once it had cooled to room temperature rather than using it hot off the stove.
Dot the top of the cake with buzzy bees and serve up to family and friends who are sure to gasp with delight.
Comments are closed here.