 |
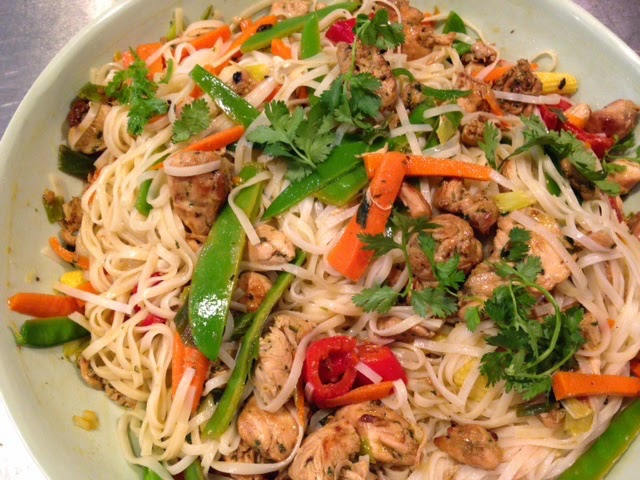
| My gluten-free aromatic version of Pad Thai. |
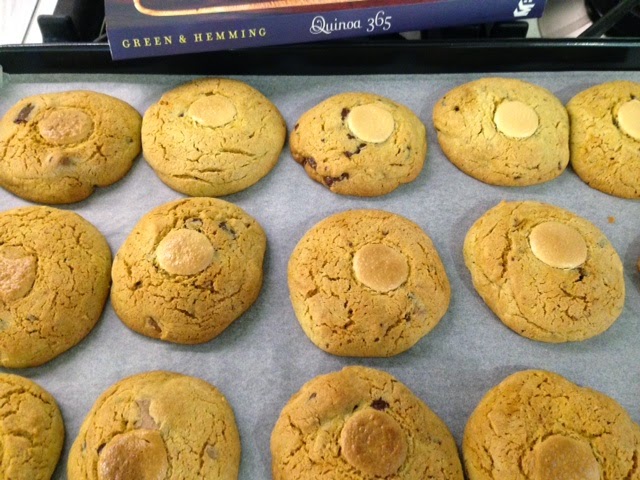 |
| Quinoa cookies, also wheat gluten free but still truly tasty. |
 |
| Moist lemon-coconut wheat based Christmas sponge. |
I’ve been avoiding wheat gluten for three weeks now – out of necessity not choice – and have found an improvement in my energy levels. Whether this is psychosomatic or actually as a result of avoiding all those delicious cakes, biscuits, bread and pastas that I would usually enjoy, well, I’m not quite sure yet. Must give this eating regime a little longer to really decide.
In the meantime, coming up with gluten-free breakfasts, snacks and baked goods has been a bit of a challenge. My favourite Sonoma soy-linseed sourdough toast smothered with orange marmalade has taken an edible hiatus. As have my husband’s hand-whisked fluffy buttermilk vanilla pancakes and my favourite cereal, Weet-bix. I jumped with joy at the sight of gluten free Weet-bix at my local Coles supermarket and then after a trying a couple of spoonfuls I raced to the bathroom desperate to rid my mouth of the horrid aftertaste. Horse-chaff springs to mind. It’s not the same. Not even close. How disappointing. Back to porridge. Pancakes made with gluten free flour are sticky, flat and not worth the whisking. As for marmalade toast. I can eat small amounts of 100 per cent spelt bread or rye and after trying a variety of brands (believe me there is an enormous difference in flavour and texture between bread companies), the one that comes out on top is definitely Sonoma spelt sourdough which also uses a spelt sourdough starter as the raising agent. So although it does not have the appealing grainy texture of soy linseed, it will certainly suffice. I am still to find a good rye bread that doesn’t settle like a brick in my stomach.
On the savoury side of things, the options for lunch and dinner are far greater thanks to the wide availability of Asian-style rice noodles, the impressive array of rice varieties like calasperra, arbrorio, jasmine and basmati. Plus, there are potatoes to suit several cooking methods, from compact kipflers, robust Dutch Creams or no-need-to-peel chats. I made this impressively tasty and vitamin packed Chicken and Vegetable Pad Thai pictured above. Now this is my version which is peanut free and although not authentic, it is still fabulously aromatic thanks to the inclusion of an entire bunch of fresh coriander leaves and zesty lime juice. My children loved it! Not a single stray noodle was left behind. Can’t wait to make it again.
My family and friends are benefiting from my baking but all I can do is inhale the sweet vanilla, chocolate, coconut, fruit and spiced aromas. I have attempted to substitute gluten free flours and spelt flour in sweets but despite my best efforts the results have been disappointing mainly in texture and appearance. Quinoa is a great wheat gluten substitute and I have successfully made Chocolate Chip Quinoa Cookies but they do have a distinctively rich nutty flavour which younger children may find a little strong. These cookies would however make a welcome Christmas gift for fellow foodie friends who are on a wheat gluten free diet. I have reprinted the recipe which I originally published in July this year.
For those who are able to indulge in beautiful wheat-based home baked goods, this pretty Lemon Coconut Christmas Sponge makes a welcome change to traditional fruit based cakes in the warm Australian Christmas weather. I quickly snapped this shot just before delivering the cake to my fellow foodie friend Stephanie and her family. Still warm from the oven with lemony icing slowly drizzling down the sides, this cake was received with welcome smiles and it wasn’t long before generous pieces were being sliced and shared around their kitchen table.
Chewy Chocolate Chip Quinoa Cookies
This will make 24 palm sized cookies.
Ingredients
250 g unsalted butter
3/4 cup raw caster sugar
2 large eggs
2 teaspoons vanilla extract
2 1/4 cups fine quinoa flour
1 teaspoon baking soda (bicarbonate of soda)
1 teaspoon salt
1 1/2 cups chocolate chips plus 24 white melts ( I used 1 cup of dark choc chips, 1/2 cup milk variety and then popped a large white chocolate melt on top of each round before they went into the oven.
Preheat the oven to 180 degrees on a conventional setting.
Place the butter and sugar in a microwave safe bowl and melt together. Using a hand whisk, beat until smooth and combined, then add the eggs and vanilla and beat again briefly.
Add the quinoa flour – no need to sift – along with the baking soda, salt and chocolate chips. Stir until all the ingredients are combined and you have a sticky dough. The mixture will be very soft and very sticky which is normal when using quinoa.
Now, you need to roll the mixture into balls about the size of a small apricot. I found that by dusting my hands with extra quinoa flour, the task was made far more manageable. Just put a couple of tablespoons into a shallow bowl and lightly press your hands into the flour before scooping up the mixture and rolling between your palms.
Place each ball onto a lined baking tray, add a white chocolate melt to each one and press down gently to form a fat disk. Ensure the dough is well spaced because quinoa expands significantly when cooked.
Place into the oven for 15 minutes until golden. Remove and cool on the tray for 10 minutes before transferring to a wire rack. You need to do this to prevent the cookies from sweating as they cool completely.
My Chicken and Vegetable Pad Thai
Ingredients
* 1.2kg chicken tenderloins cut into bite sized pieces.
* Marinade
3 fat cloves garlic
1 bunch coriander (leaves and thin stalks only)
2 tablespoons fresh grated ginger
1/2 to 1 teaspoon dried chilli flakes
juice of 1 decent sized lime
150 mls salt reduced soy sauce
1 overflowing tablespoon of runny honey
* A selection of vegetables also cut into bite sized pieces. I used 2 punnets of baby corn, 4 carrots, 250 grams of green beans, a big bunch of spring onions, 250 grams of snow peas and 2 bunches of bright green broccolini.
* 2 x packets of flat rice noodles (about 400 grams per pack) – these come in dried form and need to be soaked in bowls of boiling water until soft and separated. The soaking time varies depending on the thickness of the rice ribbons, so follow the instructions on the pack. It is usually between 6 – 10 minutes. I used 2 bowls to prevent overcrowding the rice noodles and this resulted in silky rather than stodgy noodles.
1) Simply place all of the ingredients for the marinade into a food processor and blitz until finely chopped and combined. Pour into a glass bowl and gently toss through the raw chicken. Cover and place in the fridge for at least an hour to marinade.
2) Chop up all the veggies and combine in a large bowl. Splash a tablespoon of olive oil into a wok or wide frypan and stir-fry the vegetables until they are cooked but still crisp. This takes about 5 minutes per batch. I used three pans to do this efficiently. As each batch is cooked, scrape into a large shallow serving bowl or platter.
3) Stir-fry the chicken the same way, again working in small batches. Do not be tempted to bung the entire batch into one pan all together. this will result in unevenly cooked, sweaty chicken which you want to avoid.
4) While the chicken is cooking, prepare your rice noodles according to the instructions on the packet. When ready, drain well in a colander and place in the serving bowl/s with the chicken and vegetables.
5) Use salad servers to gently toss the ingredients together. Sprinkle over some additional coriander leaves and serve immediately with extra chilli on the side for those people who prefer noodles on the spicy side.
Lemon Coconut Christmas Sponge
This will make 2 x 23cm cakes. You can successfully halve the ingredients if you only want to bake a single cake, but hey, it is the Christmas season so be generous and hand out edible greetings!
Ingredients
450 g unsalted butter, melted
450 g caster sugar
2 teaspoons vanilla extract
8 large eggs
400 g self raising flour
1/2 cup shredded coconut plus extra for decorating
2 teaspoons baking powder
6 tablespoons milk
finely grated rind of 2 small lemons
Preheat the oven to 180 degrees on a conventional setting. Grease your tins with butter and line the base and sides with baking paper. I used 2 x 23 cm round spring-form tins.
Put the butter, sugar, vanilla, lemon rind and eggs into your food processor or mixing bowl and beat until completely smooth and combined. TIP – I always break each egg into a cup, then add it to the mixing bowl just in case the shell disintegrates or there is something not quite right with the egg. It rarely happens but I prefer to take precautions rather than waste the entire batter.
Add the remaining ingredients. Beat again until combined. I like to scrape down the mixture with a spatula from the edges of the bowl part way through beating, to ensure the batter is thoroughly mixed through.
Scrape half of the batter into each tin and smooth to the edges. I weigh each filled tin on my scales to ensure an even distribution of batter and therefore equal baking time.
Place the tins into the preheated oven and bake for 40 minutes, until the cakes are a deep golden brown and come away from the edges of the tins.
Once the cakes have been removed from the oven, leave them in the tins to cool for about 20 minutes before turning out onto a cake rack to cool down enough to be comfortably handled. You don’t want to be moving an overly hot cake about because it may break. When ready, slide it onto a serving plate or cake box and drizzle over a simple lemon icing. This can be made by combining 1 cup of icing sugar mixture with the juice of half a lemon and a tablespoon of boiling water. Whisk together to form a smooth, thick but pourable icing similar to custard. You may need to add a little more boiling water to achieve this but be careful not to splash in too much or you will end up with an overly runny mixture. Pour this slowly over the cakes and immediately sprinkle with extra shredded coconut.
Comments are closed here.